







Latest Version
October 17, 2026
Snapbreak Games
Puzzle
iOS
0
Report a Problem
More About :game
Game Information
Game title: Escape Logan Estate
Genre: Puzzle, escape room, adventure
Developer: Snapbreak Games
Platform: iPhone and iPad
Game structure: Four chapters
Gameplay style: Exploration, object interaction, clue discovery, and logic puzzles
Main objective: Solve the estate’s mysteries and progress through each chapter
Price model: Free to start, with additional chapters available as in-app purchases
Story and Setting
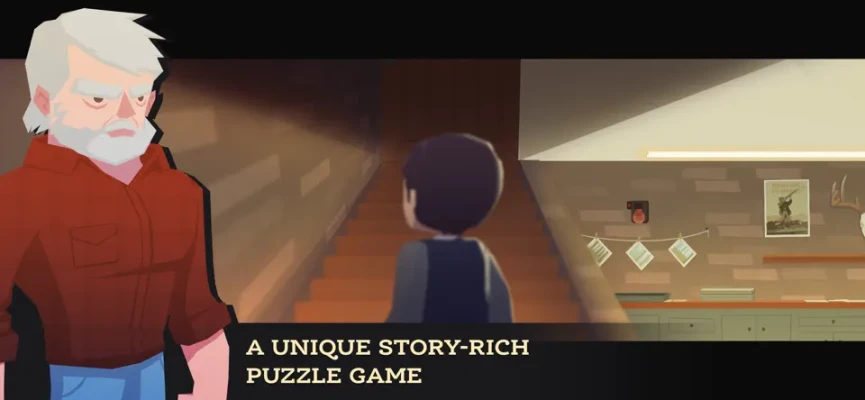
A visit to Logan Estate leaves a family in pieces. What initially appears to be an unusual trip gradually becomes a journey filled with strange discoveries, hidden clues, and unanswered questions.
Instead of following only one character, the game lets you experience events through the eyes of three different family members. Each perspective adds another piece to the larger mystery and encourages you to look carefully at the people, objects, and locations around the estate.
The story is presented through environmental details, character interactions, and discoveries made while solving puzzles. The atmosphere is intriguing rather than relentlessly frightening, making the game suitable for players who enjoy mysterious settings and thoughtful exploration.
Main Gameplay Features
1. Four Chapters to Explore
Escape Logan Estate is divided into four chapters. The first introduces the main mechanics and gives you a chance to understand how the puzzles work before deciding whether to continue through the remaining story.
Each chapter brings new locations, objects, and challenges. Pay attention to details from earlier scenes because the game often expects you to connect observations rather than follow direct instructions.
2. Logic-Based Escape Puzzles
The puzzles are built around observation, experimentation, and reasoning. You may need to discover a missing object, interpret a visual pattern, operate a mechanism, or combine information found in separate areas.
The solution is not always obvious when you first encounter a puzzle. Examine the surroundings before attempting random actions.
3. Interactive Environments
Furniture, doors, containers, machinery, and other objects may hide useful clues or items. Tap objects that look unusual, inspect anything that can be opened, and return to previously visited locations when you acquire a new tool.
4. Multiple Family Perspectives
Switching between three family members gives the adventure a broader narrative. Different characters help reveal different aspects of the estate, so pay attention to who you are controlling and what that character discovers.
5. Atmospheric Music and Visual Design
The stylized environments and soundtrack support the sense of mystery. Rather than relying on constant action, the game encourages you to slow down, study each scene, and work out what happened.
6. Hints and Walkthrough Assistance
The game has included walkthrough assistance and points-of-interest features. If you become stuck, use help selectively: look for a nudge about the next step before revealing a complete solution, so you can still enjoy solving the puzzle yourself.
Complete Walkthrough and Strategy Guide
This guide focuses on practical puzzle solutions and the order of actions needed to progress. Escape Logan Estate often expects you to inspect objects closely, remember visual clues, and revisit rooms after finding new items.
Chapter 1: The Arrival
Act 1 – Entering the Estate
Your first objective is to get inside the house and uncover the code for the locked door beneath the stairs.
Pick up the bell lying on the ground and attach it to the rope beside the front door.
Go to the back of the car and move the smaller pieces of luggage out of the way.
Remove the two large suitcases.
Ring the bell to proceed into the house.
Search the top drawer in the bedroom for a clue.
Inspect the picture on the wall to the left of the bedroom door.
Go downstairs and search the top drawer in the main hall.
Look behind the curtain on the right.
Examine the coffee table for the final clue.
Combine the five clues to reveal the three-digit code 394.
Enter 394 into the keypad beneath the stairs.
Strategy tip: If the code does not appear immediately, check whether you have inspected all five clue locations. The game rewards thorough examination more than random tapping.
Act 2 – The Hidden Patterns
The next section revolves around a locked door and several patterns concealed throughout the house.
Step 1: Find the matches and key
Enter the kitchen and open the top-right drawer to collect the matches.
Take the kettle from the stove.
Go outside to the backyard and find the glass vase containing a key.
Pour the kettle's water into the vase to bring the key within reach.
Return to the living room and use the key on the bottom drawer.
Take the projector slide and inspect the pattern inside the drawer.
Step 2: Reveal the hidden patterns
You need to discover the patterns hidden in four locations:
Kitchen window: Fill the kettle with water, return it to the stove, and heat it using the first stove knob. Steam reveals a pattern on the window.
Fireplace: Collect a log and the axe and hammer from the backyard shed area. Chop the log on the stump, collect the firewood, place it in the fireplace, and light it with the matches. Inspect the pattern revealed behind the fire.
Upstairs floorboards: Go upstairs to the far-left area. Pull back the carpet and use the hammer on the exposed boards to reveal another pattern.
Drawer: Use the pattern you found inside the bottom drawer as the remaining clue.
Enter each pattern into the keypad beneath the stairs. Check the relevant clue again if a pattern is unclear; the order and orientation of symbols matter.
Step 3: Solve the projector puzzle
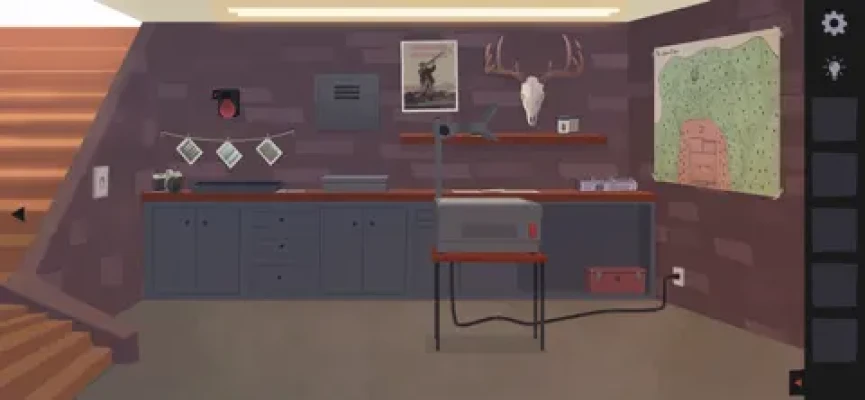
Open the newly accessible door and use the slide on the projector.
Align the plus signs on the slide with the three crosses shown on the wall.
Adjust the pins to match the positions indicated by the projection.
Return to the projector and align the circle symbols.
Match the second set of pins to the crosses.
Count the pins in the green and orange areas of the displayed map.
Enter 24 into the locked box on the bench.
Examine the pictures inside before leaving the area.
The important lesson here is to treat projected images as instructions. Match symbols first, then use the resulting image to work out the combination.
Act 3 – The Shed and the Woods
Talk to Fred.
Enter the shed and inspect the tall locked cabinet.
Solve its four grid puzzles by following the number patterns and filling the required squares.
Open the cabinet and collect the gun.
Go outside and move right into the woods.
Talk to Fred again and examine the numbers marked on the trees.
Use the clues to set the gun's aiming guides: the left-side value is −2, while the right-side calculation is 1 + 4 = 5.
Aim at the can on the tree stump and fire.
Continue to the right and shoot at the fox when prompted.
Move back through the forest toward the left to complete the chapter.
Tip: The gun puzzle depends on interpreting the numbers in the environment, not guessing the aim. Read each clue before changing the controls.
Chapter 2: A New Perspective
Chapter 2 introduces more character interactions, object combinations, measurement puzzles, and mechanisms. You will need to connect clues from the bedroom, bathroom, living room, kitchen, and backyard.
Act 1 – The Bedroom and Kitchen
Talk to Helen, then leave the bedroom and go downstairs.
Search the living-room drawers for a hanger and a measuring cup.
Look through the window and memorize the four arrows.
Go upstairs to the bathroom, remove the bath drain cover, and use the hanger inside.
Move the hanger in the order shown by the arrows: up, down, down, left.
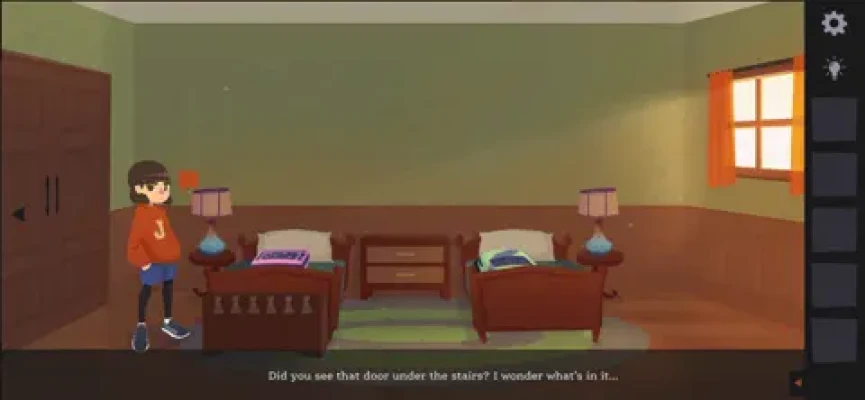
Return to the bedroom and collect the board game from the bed.
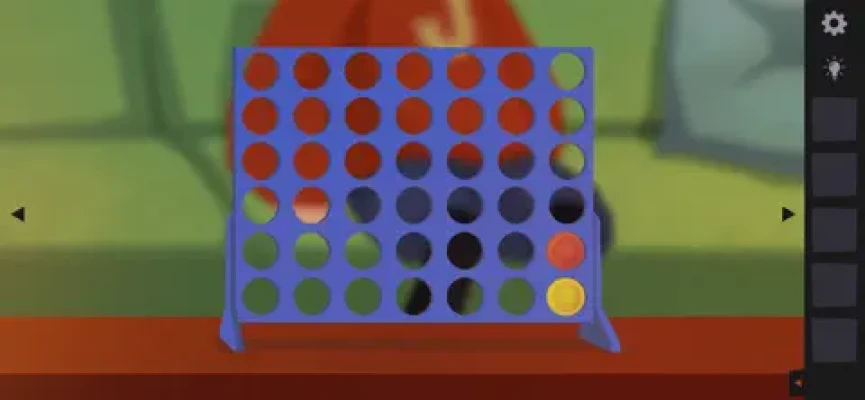
Take it downstairs and play Connect Four with Sam.
After winning, collect the recipe and second measuring cup.
Put the recipe and both measuring cups on the kitchen counter.
For the flour-measuring puzzle, use the three-cup and five-cup measures in this order:
Fill the three-cup measure and pour it into the five-cup measure.
Repeat the transfer.
Empty the five-cup measure into the sink.
Transfer the remaining flour from the three-cup measure into the five-cup measure.
Fill the three-cup measure again and pour it into the five-cup measure.
Empty the five-cup measure into the yellow bowl.
Place the bowl on the frying pan, use the third stove knob to heat it, and wait for the pancakes. Take them upstairs and use them at the children's room door.
Act 2 – Keys, Books, and the Sundial
Collect the peg from the bed and note the key behind the broken window.
Search the living-room drawers for a magnet and another peg.
Find the light bulb in the kitchen's top-right drawer.
Collect the final peg from the bathroom.
Place the bulb in the sockets above the bathroom mirror one at a time. Record the patterns and take the bulb back.
Return to the bedroom and use the magnet to move the key through the opening in the window.
Use the key to open the door to the room on the left.
Inspect the diagram on the bedside table.
Rearrange the grey books on the bookshelf so the lines connect correctly, then arrange the lower books according to the diagram.
Insert the three pegs in the top section of the bookshelf using the mirror patterns.
Inspect the urn revealed by the mechanism.
Next, head to the backyard:
Collect the dial outside the shed and the trap from the shed bench.
Attach the dial to the safe beneath the bench.
Set the yellow dial to the right, green to the left, silver to the top, and purple to the bottom.
Open the safe and collect the gnomon.
Place it on the sundial platform and record the symbol shown by its shadow.
Use the light bulb in the upper-left and upper-right light fittings in turn, recording the additional shadow symbols.
Enter the three symbols into the locked cupboard in the shed to obtain the bait.
Strategy tip: The sundial puzzle is a sequence of observations. Record the symbol for each lighting condition rather than trying to remember them all.
Act 3 – Wires and the Cabinet
Leave the bedroom and talk to Helen in the room on the left.
Note the number 834 on the wall and collect the wires from the pillow.
Search the downstairs drawers for a screwdriver and another symbol clue.
Use the screwdriver to remove the panel beside the right-hand door.
Insert the wires and straighten the upper and lower connections.
Replace the cover and screws.
Press the panel buttons in the sequence indicated by the game's clue.
Once outside, talk to Sam and enter the shed.
Solve the four cabinet grid puzzles.
Collect the gun from the cabinet and head into the woods to complete the chapter.
For the wire puzzle, focus on connecting the wires cleanly and use the recorded number clue to guide the button sequence. If a connection fails, recheck the wires before repeating the input.
Chapter 3: The Family's Secrets
Act 1 – Cleaning and Preparing
Talk to Luke.
Search the living-room drawer for cleaner and collect the clothes from the sofa.
Go upstairs to the children's room and collect the clothes from the right bed.
Open the chest by pressing its six latches in this order: 1, 2, 6, 5, 3, 4, counting from left to right.
Place both sets of clothes inside and collect the cloth fragment.
Clean the window with the cleaner, then use the cloth on all four panes.
Go to the backyard and talk to Fred.
Collect the axe from the shed and give it to Fred.
Pick up the logs and place them in the stand beside the living-room fireplace.
Collect the lighter from the tree stump.
Use the lighter on the frozen drawer inside the refrigerator, then collect the meat.
Give the meat to the fox beside the shed.
Act 2 – Fuses and the Safe
This section asks you to gather four fuses from different locations and restore a system.
Talk to Duncan in the kitchen.
Search the living-room drawers for compressed air.
Solve the sliding puzzle on the radio to obtain the first fuse.
Collect the hammer from the bathroom and note the green arrow on the right side of the bath.
Solve the sliding puzzle at the flickering light in the children's room to obtain the second fuse.
Talk to Luke, then collect the third fuse from the flickering light in the main bedroom.
Enter the far-left room and record the yellow arrow on the bed.
Solve the projector's sliding puzzle beneath the stairs to obtain the fourth fuse.
Use compressed air on the fuse-box latch, then strike it with the hammer.
Open the box, insert all four fuses, and connect the matching-colored squares.
Afterward, return to the kitchen and talk to Duncan again. Go to the backyard, collect the dial outside the shed, and attach it to the safe beneath the bench.
Set the dials as follows:
Yellow: down
Green: right
Silver: left
Purple: up
Open the safe and collect the ball. Take it outside and use it with the fox.
Act 3 – The Wood Puzzle and Minigame
Talk to Luke and collect the axe from the shed.
Examine the tree stump and make four cuts to divide the wood into nine pieces, each marked with an X.
Collect the twigs and give them to Luke.
Play the Dots and Boxes minigame and win.
Move through the woods to see the next story event.
Return left twice to finish Chapter 3.
Strategy tip: In Dots and Boxes, avoid completing a box for your opponent unless doing so creates a better opportunity later. Look ahead at how each line changes the number of sides available to both players.
Chapter 4: The Final Mystery
Act 1 – Opening the Gate
Try the gate and confirm that it is locked.
Inspect the toolbox to the left.
Press its buttons in the order indicated by the arrows to open it.
Collect the screwdriver.
Open the left power box and rotate its symbols until the electrical path connects from left to right.
Repeat the process on the right power box.
Check the entrance sign and note which letter lights are off: C, N, and A.
Go through the gate.
Win the memory minigame at the first stall to earn 1,000 tokens.
At the second stall, drop balls into the C, N, and A letters to earn another 1,000 tokens.
Repair the next power box and examine the lockers after the customers leave.
Press the locker buttons in the sequence shown by their arrow clues.
Collect the hammer and use it on the strength tester. Click while the indicator is in the green zone to earn the remaining 1,000 tokens.
Spend the 3,000 tokens to obtain the camera.
Act 2 – The Three Photographs
Your goal is to collect three photographs and return them to the album.
Inspect the album and note the missing pictures.
Go left twice and play the color-memory game on the ground.
Repeat the color patterns correctly to obtain the red key.
Climb the tree ladder and solve the safe puzzle by turning all arrows upward.
Collect the blue key and matches.
Use the red key on the red gate.
Follow the paths in the direction the flames bend until you reach the pink lily. Photograph it and note the number 8 on the stone.
Return and use the blue key on the blue gate.
Collect the wood, place it in the holder, and light it with the matches.
Follow the flame direction along the path, repeating the process as needed, until you reach the deer. Photograph it and note the number 15.
Return to the tree ladder and set the clock to 8:15.
Collect the purple key and study the photographs showing flower positions and flame directions.
Use the purple key on the purple gate.
Follow the paths using the flower and flame clues to reach the red tree. Photograph it.
Return to the album, insert all three photographs, and give the completed album to Sally.
Act 3 – The Garden and Final Puzzles
Inspect the colored pots and collect a tile.
Enter the shed and search the top drawer for a spade and matches.
Solve the four cabinet grid puzzles and collect the soil and another tile.
Go outside and move right twice to collect the watering can.
Use the spade on the potted plant on the table to obtain the third tile.
Return to the tree stump and insert all three tiles into the tile puzzle.
Rotate the tiles until all five outer nodes are connected and there are no loose ends.
Collect the completed tile board and use it on the shed safe.
Take the seeds from inside and examine the photograph showing the correct order of the colored pots.
Look through the window at the four tree symbols.
Open the locked cupboard by entering the symbols in the order matching the pots outside: devil, crescent moon, target, and trident.
Collect the candle.
Return to the table and use the seeds, soil, and watering can on the pot.
Place the candle on its stand and light it with the matches.
For the final sequence, inspect the generator in the forest and solve its three button puzzles by following the arrow clues. Then examine the trees behind the lights and record the numbers formed by the branches: green 2, red 4, and blue 7.
Check the color chart and use the combinations of colored lights to determine the code for the fox cage. Once the cage puzzle is solved, Chapter 4 is complete.
Essential Tips for Solving Escape Logan Estate
Inspect every room carefully. Small clues can be hidden behind curtains, inside drawers, on furniture, or on the floor.
Revisit earlier rooms. New tools may reveal interactions that were impossible before.
Keep notes. Write down numbers, arrow directions, colors, and symbols. Several puzzles depend on clues discovered somewhere else.
Use tools on likely targets. A hammer, screwdriver, magnet, or other item may work only on a particular object.
Watch the order of actions. Some puzzles require you to activate a mechanism, observe its result, and then use that information elsewhere.
Avoid random combinations. If a code does not work, review the clues and check their order rather than trying every possibility.
Use hints when needed. A small hint can help you continue without spoiling an entire chapter.
Difficulty and Replay Value
Escape Logan Estate is best suited to players who enjoy observation-based puzzles and a mystery that unfolds through exploration. Its difficulty comes less from quick reactions and more from remembering details, interpreting symbols, and connecting information across rooms.
The four-chapter structure gives the adventure a clear sense of progression. Minigames add variety to the escape-room puzzles, while the different family perspectives provide additional context for the story.
The main drawback is that some clues can be difficult to notice on a small screen, and the narrative may feel indirect to players who prefer frequent explanations. Patient players who enjoy working things out independently are likely to get the most from it.
Pros and Cons
Pros
Four chapters of puzzle-focused gameplay.
Distinctive, stylized environments.
A mix of object puzzles, codes, and minigames.
Multiple family perspectives.
A free first chapter to try before purchasing more content.
Cons
Some clues are easy to overlook.
Certain puzzles require careful note-taking.
The story leaves some details for players to interpret.
Additional chapters require in-app purchases.
Frequently Asked Questions
How many chapters are in Escape Logan Estate?
The game has four chapters, with the first chapter available for free.
Who developed Escape Logan Estate?
The game was developed by Snapbreak Games.
What kind of game is Escape Logan Estate?
It is a puzzle adventure built around exploration, hidden clues, object interactions, escape-room challenges, and minigames.
What is the code for the first locked door?
The first three-digit code is 394. Collect and assemble all five clues found around the bedroom and main hall to reveal it.
How do you reveal the kitchen window clue?
Fill the kettle with water, place it on the stove, and use the first stove knob to heat it. The steam reveals the pattern on the window.
How do you solve the first projector puzzle?
Use the slide on the projector, align the plus symbols with the crosses on the wall, and adjust the pins. Repeat the process for the circle symbols, then use the map to determine the box code.
Is Escape Logan Estate suitable for casual players?
Yes, especially for players who enjoy slow-paced puzzle solving. Some sections require patience and careful observation, so it may be less appealing to anyone looking for fast action.
Can you play without using a walkthrough?
Yes. The game is designed around discovering clues and experimenting with objects. If you get stuck, use a hint to help with the next step rather than revealing every solution.
Final Verdict
Escape Logan Estate is a thoughtful mystery adventure for players who enjoy examining detailed environments, connecting clues, and solving puzzles without constant instructions. Its four chapters offer a variety of challenges, from simple object interactions to more involved code, projection, and mechanism puzzles.
For the best experience, take your time, keep track of symbols and numbers, and revisit rooms whenever you find a new item. The satisfaction comes from seeing how seemingly unrelated details fit together to open the next part of the estate.
Rate the Game
User Reviews














Popular Games


















 Android
 iOS
iOS Windows
 Xbox
Xbox